
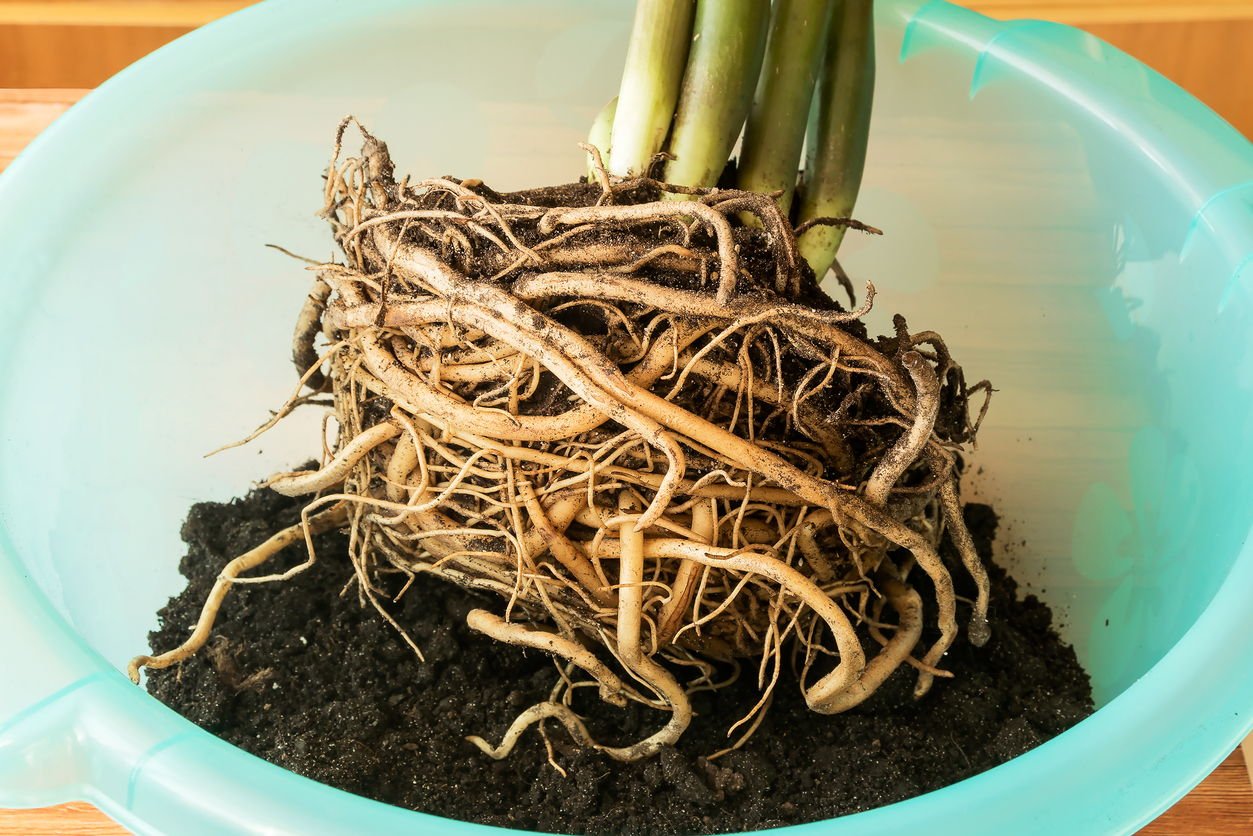

In the previous post, we discussed how to know when your houseplant is ready to be repotted. Now we’ll walk through exactly what to do when it’s time to repot it.
#1 Make sure your houseplant needs to be repotted.
If you aren’t sure, check out my post here that will help you answer that question. < Click here.
#2 Pick a pot that has drainage holes and is, at most, 2 inches larger than the previous pot
Why drainage holes? Drainage holes ensure that excess water doesn’t get trapped around the plant’s roots and cause root suffocation, which can lead to rot.
Why only 2 inches larger than the previous pot? 1 or 2 inches larger provides a good amount of room for the roots to expand, while not providing too much room for excess moisture to linger and cause the roots to rot.

#3 Ensure you have houseplant potting mix to fill the new pot
Most potting mixes labeled for houseplants will do the job.
If you are worried about overwatering, you could add perlite or pumice to the mix to provide additional aeration.
Anywhere from 20% to 50% can be added (if it’s a cactus or succulent, you could add even more). You’ll just need to monitor how quickly your plant dries after repotting to get a feel for how frequently it will need moisture.


#4 Remove the houseplant from its current pot.
If the plant is currently in a plastic nursery pot, gently squeeze the sides. Kind of like you’re hugging it or gently massaging it.
Most of the time, this will be enough to loosen the soil and roots so the plant will slip right out of the pot when tipped on its side.
If this doesn’t work or if the plant is in a pot that doesn’t bend, you may need to use a butter knife, chopstick, or something to gently press down along the sides of the pot to loosen the roots and the soil.
Once you have gone around the pot, loosening the sides with your tool, the plant typically comes out.
When plants are really stuck, I’ve been known to bang on the pots, wiggle the plants, and in extreme cases use a hammer to break the pot open to free the plant.
These measures aren’t ideal, but having the plant stuck and not removable isn’t ideal either.
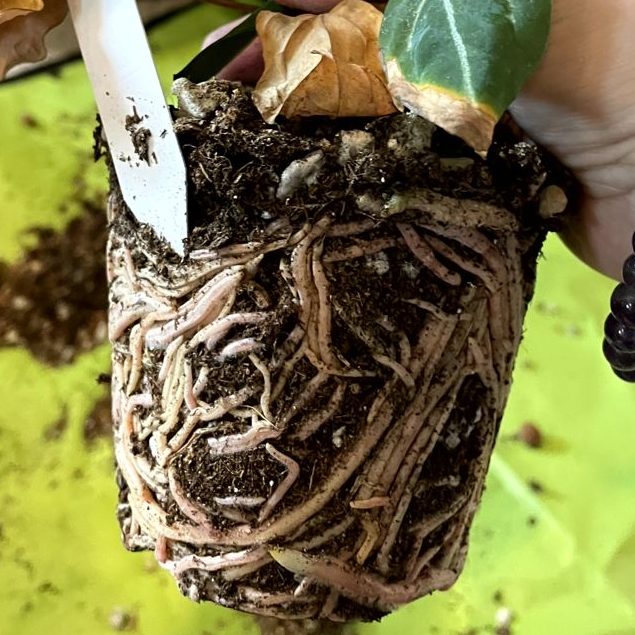
#5 Ensure the roots seem healthy
Roots should look similar in color. They should not be mushy or slimy, which is indicative of rot.
Roots should have a pleasant dirt-like smell. If they have a funky foot-like smell, that could be rot.
Roots should not be deflated and dried. If they do, they are dead roots.
Extra special care will need to be taken if there are mushy, slimy, smelly, or dead roots around.
For mushy, slimy roots: Root Rot: How to Identify, Control, and Prevent It.
For dry, deflated roots: Dry Rot: What It is, Why It Happens, How to Prevent It.
If you aren’t sure whether it’s mushy, smelly, or dead, it’s probably not. It’s pretty gross when it is.
#6 Put some fresh potting mix in the bottom of the new pot
The reason we put new potting mix on the bottom of the new, larger pot is not only to provide space for the roots to grow, but also to prop the rootball up so it isn’t too deep in the pot.
You want the top of the rootball to be about the same depth into the new pot as it was in its old one.
#7 Place the plant’s exposed roots into the pot, making sure the top of the root ball is at least a little below the top of the pot, so roots won’t be exposed
The roots of a plant are kind of like a plant’s internal organs, and, for most plants, soil-grown roots are not usually exposed to the elements.
There are, of course, exceptions to the rule. So, feel free to consider how the plant was in its original pot and mimic that in its new one, or research the specific type of plant to get a better idea about it.
If you aren’t sure what type of plant it is, you are always welcome to reach out to me via social media or email and ask! I’m happy to help.

#8 Fill in the empty area around the root ball with potting mix and lightly cover the top of the root ball as well
When you backfill the pot with the soil mix you bought:
- Tap the sides of the pot
- Hold the pot above a hard surface and gently tap it on the surface repeatedly
- Push the mix into the crevices to try to fill any big gaps
These methods will help settle the soil into the pot and around the roots, preventing excessive settling and big air pockets going forward.
We aren’t going for super-snug here, so there’s no need to press hard, but we do want the pot to be filled.
The good news is that even if you don’t quite get it there, you can always come back later and add more.
#9 Keep adding more soil or potting mix until a nice, even layer is across the top of the root ball
The title says it all here.
#10 Water the plant thoroughly now that it’s repotted and place it back in its sunny spot.
Voila! The plant is done!
Related Posts
- You Can Learn How to Grow Houseplants. Start Here, #1
- How to easily ensure your houseplant will get enough sunlight. Start Here, #2
- How to water your new plant (and feel good about it). Start Here, #3
- Fertilizing a houseplant seems complicated, but it’s not. I’ll prove it. Start Here, #4
- 5 Easy Ways to Know if Your Houseplant Needs to be Repotted. Start Here, #5
- A Fast, Easy Guide to Help You Repot Your Houseplant. Start Here, #6 (You are Here)
- What about pests? What does a beginner need to know? Start Here, #7 (Coming Soon)
0 Comments